Build configuration
- Build pipeline
- Configuring build
- Build versioning
- AssemblyInfo patching
- .NET Core
.csprojfiles patching - Clone directory
- Environment variables
- Script blocks in build configuration
- Installing additional software
- Hosts entries
- Build matrix
- Rolling builds
- Scheduled builds
- Build queue
Build pipeline
Every build goes through the following steps:
- Run
initscripts - Clone repository into clone folder
- Checkout build commit
cdto clone folder
- Restore build cache
- Run
installscripts - Patch
AssemblyInfofiles - Modify
hostsfiles - Start services
- Build
- Run
before_buildscripts - Run msbuild
- Run
after_buildscripts
- Run
- Test
- Run
before_testscripts - Discover and run tests
- Run
after_testscripts
- Run
- Call
build_successwebhooks - Package artifacts
- Deployment
- Run
before_deployscripts - Run all configured deployments
- Run
after_deployscripts
- Run
- Finalize successful builds:
- Call
deployment_successwebhooks - Run
on_successscripts - Save build cache
- Call
- Finalize failed builds:
- Call
build_failurewebhooks - Optionally save build cache
- Call
deployment_failurewebhooks - Run
on_failurescripts
- Call
- Finalize both successful and failed builds:
- Call
on_finishscripts
- Call
Note that you can forcibly terminate build with success from script with appveyor exit cmd command or Exit-AppVeyorBuild PS command. This can be done from any script except Finalize ones (on_success, on_failure and on_finish).
If you need to can forcibly terminate build with failure you can run any command with non-zero exit code, for example exit 1 cmd command or throw PS command.
Time limitations
All plans have 60 minutes quota per build job.
Configuring build
Project builds can be configured by either appveyor.yml or on the user interface.
appveyor.yml is a project configuration file in YAML format that should be placed in the root of your repository. At a minimum appveyor.yml is just an empty file.
Each method has pros and cons. Via the User interface one can control every aspect of the build process without ever touching the repository. On the other hand, YAML may seem more sophisticated and familiar for those coming from a Linux platform. Another thing to consider is that when you fork/clone a project with its configuration stored in appveyor.yml, you simply add a new project in AppVeyor referencing repo and you are good to go.
appveyor.yml and UI coexistence
It’s worth noticing that both appveyor.yml and UI configuration are mutually exclusive. It’s always either YAML or UI - the settings from each are not merged. If you have appveyor.yml in your repo it will override all settings made on the UI unless explicitly disabled by Ignore appveyor.yml. There are few exceptions, which are:
- Environment variables. Variables defined on UI are getting merged with those ones defined in
appveyor.yml. Variable values with the same names are getting overridden with values from UI. - Notification settings defined on UI are getting merged with those ones defined in
appveyor.yml. - Build version format is taken from UI if it is not set in
appveyor.yml.
YAML file alternative naming
AppVeyor supports dot-file-style YAML named .appveyor.yml as is. Another custom name like experimental.yml is also possible, and can be specified in Custom configuration .yml file name setting.
Alternative YAML file location
It is possible to keep YAML file outside of repository. For that place YAML file as a plain text (Content-Type: text/plain) and anonymously accessible at some HTTP (or HTTPS) location. If using some web hosting, let file has .txt extension for it to get correct content type. However better option is to use permalink to GitHub gist raw file, and take advantage of keeping file change history on GitHub. After that place URL to YAML file to Custom configuration .yml file name setting. Needless to say that secure variables should be used for secrets in YAML file.
Classic Git repositories and YAML
Classic Git (unlike GitHub or BitBucket) does not allow individual file check in, therefore YAML file in classic Git repository is being ignored. Workaround is to use Alternative YAML file location described above.
YAML format notes
While working with YAML there are few important points to be aware of:
- YAML format is sensitive to indentations that must be spaces. Do not use tabs to indent configuration sections.
- Section names in YAML are case-sensitive, so “deploy” and “Deploy” are different things in YAML.
Build versioning
Every time you push changes into repo or click the New build button AppVeyor starts a new build with an incremented build number.
You may use the build number for versioning purposes (assemblies version patching, naming artifacts, etc.) or just use it for reference.
AppVeyor uses the version value for naming builds. You can have “through” builds numbering in which major and minor parts of the version are changing and the build number is never reset or you can reset the build number for every new version. In any case, while the build number could be reset to any previously used value, the version must be unique across all builds.
You can specify version format in appveyor.yml:
version: '1.0.{build}'
AssemblyInfo patching
AppVeyor has a built-in task for setting values in AssemblyInfo files during the build. This “patching” process is disabled by default for newly added projects.
You can enable patching on the General tab of project settings or in appveyor.yml:
assembly_info:
  patch: true
  file: MyVersion.cs
  assembly_version: '{version}'
  assembly_file_version: '{version}'
  assembly_informational_version: '{version}-rc1'
Note that specific attribute like AssemblyInformationalVersion should exist in AssemblyInfo file to be patched.
You can use environment variables substitution in file name and version formats, for example:
assembly_version: $(appveyor_build_version)
.NET Core .csproj files patching
Like with AssemblyInfo patching, AppVeyor can patch .NET Core .csproj files. This also applies to .NET Standard and ASP.NET Core .csproj files, which has the same new structure, different from classic .NET .csproj files. The main practical reason to patch those files is to set version to be used by nuget packaging of .NET Core and .NET Standard libraries (created in Visual Studio 2017, and probably later versions).
You can enable patching on the General tab of project settings or in appveyor.yml:
dotnet_csproj:
  patch: true
  file: '**\*.csproj'
  version: '{version}'
  package_version: '{version}'
Note that specific attribute like PackageVersion should exist in .csproj file to be patched.
You can use environment variables substitution in file name and version formats, for example:
package_version: $(appveyor_build_version)
Clone directory
The format of the default directory on the build machine for cloning repository is c:\projects\<project-slug>.
If required by your project (say, if absolute paths are used to reference its parts) you can change the clone directory path on the Environment tab of project settings or in appveyor.yml:
clone_folder: c:\projects\myproject
Environment variables
Immediately after cloning the repo on the build worker AppVeyor sets standard environment variables.
Custom environment variables
Custom environment variables can be set on the Environment tab of project settings or in appveyor.yml:
environment:
  variable1: value
  variable2: value
Interpreters and Scripts
AppVeyor allows you to choose between Command scripting and PowerShell scripting. If you are using the Command interpreter and batch files then prefix your script with cmd: as shown below. Do not use command:.
test_script:
  - cmd: ECHO this is batch
If you are using the PowerShell then prefix your script with ps: as shown below. Do not use powershell:.
test_script:
  - ps: Write-Host "This is PowerShell"
Setting environment variables in build script
CMD:
set MY_VARIABLE=value
Once a variable is set for a batch file you access it by %MY_VARIABLE%.
PowerShell:
$env:MY_VARIABLE="value"
Once a PowerShell variable is set you access it by $env:MY_VARIABLE. Do not use PowerShell syntax of $MY_VARIABLE.
Secure variables
When you work with OSS projects and you’d like to hide some sensitive data from everyone’s eyes you can use secure variables in appveyor.yml.
AppVeyor generates a unique encryption key for every account. To encrypt variable values go to Account → Encrypt data tool.
To use encrypted variable in appveyor.yml:
environment:
  my_variable:
    secure: <encrypt_value>
“Secure” variables means you can safely put them into appveyor.yml that is visible to others. Other than that they are just regular environment variables in a build session that could be easily displayed in a build log by simple Get-ChildItem env:.
However, secure variables are not decoded during Pull Request builds which prevents someone from submitting PR with malicious build script displaying those variables. In more controlled environment through with a trusted team and private GitHub repositories there is an option on General tab of project settings to allow secure variables for PRs.
Script blocks in build configuration
There are a lot of places in configuration where you can inject your custom logic like “install” scripts, “before build”, “after tests”, “deploy” scripts, etc.
Every script could be authored either as a batch or PowerShell snippet.
When you set Cmd script on the UI its body will be split into lines and executed as separate commands with an exit code check after each line. For example, consider the following “install” script:

If exit code of the first command (gem update --system) is different from a 0 script execution will be terminated and entire build will return as failed.
When PowerShell is selected the entire body is treated as a single script, so you can use control flow logic inside it. For example:
PowerShell script is considered successful if it finishes without exception.
If you need to check execution results of commands in the middle of PowerShell script you can verify $LastExitCode after calling a command and terminate earlier, for example:
vstest.console myassembly1.dll
if ($LastExitCode -ne 0) { $host.SetShouldExit($LastExitCode)  }

vstest.console myassembly2.dll
if ($LastExitCode -ne 0) { $host.SetShouldExit($LastExitCode)  }
There are a few ways of configuring scripts in appveyor.yml.
For example, this is the same configuration as shown on the first screenshot:
install:
  - gem update --system
  - gem install rake
By default, script line is treated as batch command, but you can specify script engine explicitly:
before_build:
  - cmd: ECHO this is batch
  - ps: Write-Host "This is PowerShell"
To add multi-line PowerShell script covering an entire event:
- note that indentation for lines after
- ps: |should be at least 4 spaces longer
on_success:
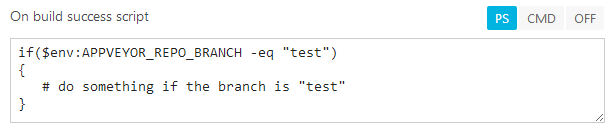
- ps: |
if ($true)
{
Write-Host "Success"
}
This syntax is also valid:
- this kind of syntax is being auto-generated by Export YAML menu
- spaces between lines created by Export YAML menu are mandatory
on_success:
- ps: >-
    if ($true)

    {
      Write-Host "Success"
    }
Installing additional software
Every build runs on a pristine virtual machine that is not shared with any other builds. VM state is not preserved between builds.
You can install additional software on the build machine using Chocolatey, Web Platform Installer (Web PI) or PowerShell.
install: <script>
or
install:
  - cmd: rd temp
  - ps: Write-Host “Hello!”
Chocolatey
install:
  - cinst <package>
PowerShell
install:
  - ps: (new-object net.webclient).DownloadFile('https://mysite.com/mypackage.msi', 'mypackage.msi')
  - ps: msiexec /i mypackage.msi /quiet /qn /norestart /log install.log PROPERTY1=value1 PROPERTY2=value2
WebPI Command Line
install:
  - WebpiCmd /Install /Products:<Title or ID>
Hosts entries
hosts:
  localhost: 127.0.0.1
  db.server.com: 127.0.0.2
Build matrix
Every AppVeyor build consists of one or more jobs. A build is considered successful if all jobs are successful. A build immediately fails when any of its jobs fail.
AppVeyor enables easy testing against multiple combinations of platforms, configurations and environments. Specify which operating systems, build configurations and platforms you would like to include into the build matrix and AppVeyor will create a build with multiple jobs for all possible combinations.
Build matrix supports the following dimensions:
- Operating system
- Environment variables
- Platform, e.g. x86, x64, Any CPU
- Configuration, e.g. Build, Debug
- Test categories
- Build cloud
For example, selecting x86, Any CPU for Platform and Debug, Release for Configuration yields the build with the following jobs:
- x86, Debug
- x86, Release
- Any CPU, Debug
- Any CPU, Release
To configure build matrix in appveyor.yml:
environment:
  # these variables are common to all jobs
  common_var1: value1
  common_var2: value2

  matrix:
    # first group
    - db: mysql
      provider: mysql

    # second group
    - db: mssql
      provider: mssql
      password:
        secure: DHEU39J6X9VD376==

platform:
  - x86
  - Any CPU

configuration:
  - Debug
  - Release

matrix:
  fast_finish: true
Failing strategy
By default AppVeyor runs all build jobs. If at least one job has failed the entire build is marked as failed. Sometimes, you want the build fail immediately once one of the job fails. To enable fast fail strategy add fast_finish setting into appveyor.yml:
matrix:
  fast_finish: true
Allow failing jobs
You can configure AppVeyor to allow certain build matrix rows to fail and still continue with the rest of the build. The result of these failing jobs is not counted towards build status. This may be useful if you are experimenting with running tests on the latest version of a platform or framework, e.g. Node.js 0.11.
To allow failing jobs add matrix.allow_failures section into appveyor.yml (the feature is not available on UI):
matrix:
  allow_failures:
    - <condition>: <value>
<condition> can be os, image, configuration, platform, test_category or the name of environment variable.
For example, to allow job failing on Node.js 0.11 (TBD - add link to Node.js instructions):
matrix:
  allow_failures:
    - nodejs_version: 0.11
The following example allows failure for platform=x86, configuration=Debug and platform=x64, configuration=Release jobs:
matrix:
  allow_failures:
    - platform: x86
      configuration: Debug
    - platform: x64
      configuration: Release
The matrix is already optimized for fast failing. The logic is as follows:
- If a job that does not allow failure has failed the build fails.
- If a job that does allow failure has failed and the rest of jobs allow failures the build fails.
See complete appveyor.yml reference for full syntax.
Exclude configuration from the matrix
It is possible to exclude configuration from the matrix. Syntax is the same as for allow_failures (this feature is also YAML-only and not available in UI currently).
Please consider the following example:
configuration:
- Debug
- Release

environment:
  matrix:
    - MY_VAR: A
    - MY_VAR: B

matrix:
  exclude:
    - configuration: Debug
      MY_VAR: B
Here we have 2 matrix dimensions: configurations and variables and each has 2 values. Therefore by default it should be 2X2=4 build jobs. But if combination of configuration: Debug and MY_VAR: B is not needed, we can exclude it. In comparison with allow_failures build will not be even started for this combination.
We still recommend use allow_failures for “unstable” cases which should be built but should not affect build results, and use exclude for cases where build should be completely skipped.
Rolling builds
“Rolling builds” are great for very active OSS projects with lengthy queue. Whenever you do a new commit to the same branch OR pull request all current queued/running builds for that branch or PR are cancelled and the new one is queued. Other words, rolling builds make sure that only the most recent commit is built.
For example, you do commit A to master branch - it’s being queued and then run. Then you do B commit to master branch while A is running - build of A will be cancelled immediately and B is queued. If you do another C commit while B is queued it will be cancelled and C queued.
Scheduled builds
AppVeyor uses NCrontab library to calculate a build schedule.
Schedule hour values should be UTC.
External links:
Build queue
Sometimes you may wonder why your build is not being run immediately or remains in “queued” state longer than usual.
This is how builds scheduling works.
First, the maximum number of builds running simultaneously is defined by account plan. For Free and Professional it’s 1 concurrent job, for Premium it’s 2. This is per account.
If there are no running builds under your account then there might be other reasons why the build is still in Queued state. First, VM assigned to a build is still being provisioned. We maintain some “cache” of pre-heated VMs, and if a build is assigned to pre-provisioned machine it should start almost instantly. If there are no machines in there then VM is creating from scratch. Usually, it should take no longer than 3-4 minutes.
However, sometimes (in rare occasions) due to Azure conditions provisioning could take longer, up to 10 minutes, but AppVeyor waits 5 minutes for machine being online and if it’s not the build is rescheduled to another machine. Sometimes, machine is failed to report “online” state to AppVeyor and it’s also getting replaced with a new one. Another reason could be Service Bus queue which is lagging some times.
We are constantly working on monitoring, understanding and mitigating those Azure-related issues to make AV architecture more robust and resilient.
However, technically there are no limitations on how many VMs can be run at the same time and we are not enforcing the maximum number of concurrent builds across all accounts.
Builds prioritization
When a lot of commits are made by your team during the day there are multiple builds awaiting in “queued” state. It is possible to move up and down certain builds in a queue by changing their projects’ priority. Build priority setting is located on General tab of project settings. When priority is not set builds are not prioritized. When priority is set builds in a queue are in ascending order. The higher number - the lower priority; the highest priority is 1. Builds with priority has precedence over those ones without it.
As a real-world example, suppose we have three projects: A, B and C. We want builds of project A always come first, then builds of project B and the rest in FIFO order. We set project A build priority to 1 (the highest priority) and project B priority to 2. Then we did commits in the following order (provided our account allows only one concurrent job and first build of project C is still running):
C (no priority) - 1 - running
C (no priority) - 2 - queued
B (priority 2)  - 1 - queued
A (priority 1)  - 1 - queued
B (priority 2)  - 2 - queued
Build queue will look as below:
C (no priority) - 1 - running
A (priority 1)  - 1 - queued    <-- this build comes next
B (priority 2)  - 1 - queued
B (priority 2)  - 2 - queued
C (no priority) - 2 - queued